Tutorial, part the fifth

And a good Wednesday morning to everyone!

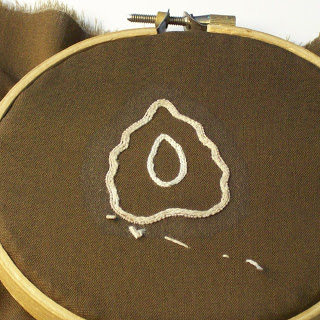
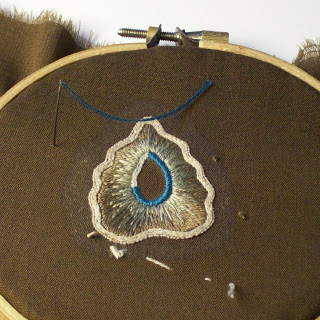
Continuing with the piece. Overcast stitch the center padding (like satin stitch, just not angled) I used two strands of DMC floss. Doing this, gives your area of turkey stitch a nice border, and keeps the edges clean.
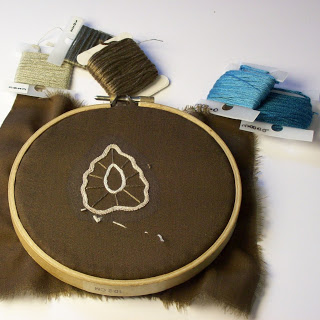
Next we start the Turkey stitch Mary Corbett has a wonderful video tutorial and description of the stitch, at the link.
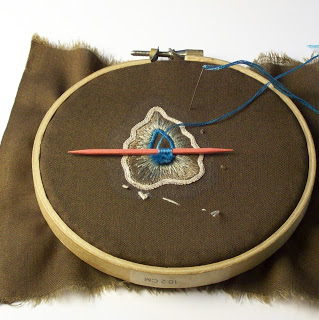
I'm working with three strands of DMC you can work with more, of course, but I find this to be more manageable, and trims up nicely. I'm using a toothpick to keep the loops, more or less, even. It makes the trimming go a lot smoother, if you use a gauge like that. For smaller sections, I'll use a thick wire.

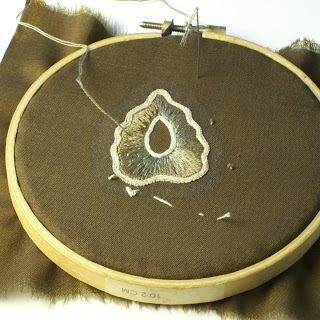
As you finish each row, trim your loops. You'll find that it's a lot easier to get all the loops trimmed if you cut them as you go. If you wait to the end, you'll find that you've got uncut loops, and they reflect the light differently. (you may like the effect. I really don't)

For this one, use the heavier needle, you will want the extra length, and sturdiness to grab onto. (this is from the file of lessons learned the hard way. don't be like me)

Also, the denser the stitch is worked, the more full the pile is. And it just looks better.

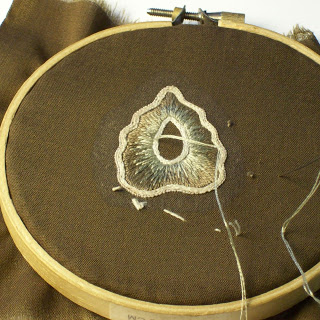
MOST IMPORTANT: Do NOT, I repeat DO NOT attempt to trim and shape the fluff until the whole area is finished. Also, do not start trimming and shaping on one day, and come back the next to finish it. You will find a ridge, or line forms, and you will never get rid of it, unless you pull it out and start all over. (Once again, don't be like me)

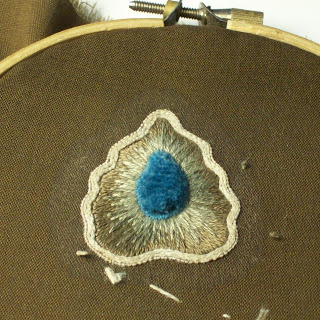
Trim and shape the fluff. Work methodically from the outer edges to the inner section. This will give the fluff a nice domed shape. As you're going, stop and fluff the fluff with an eyebrow brush. Really work the bristles in, since that's what separates the floss strands and makes it look like lush carpeting.

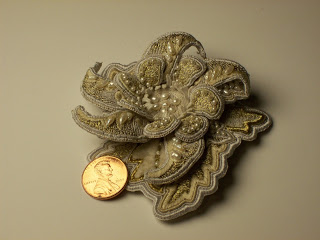
That's all for today. Tomorrow we'll add the beads/pearls.

Happy Stitching!

Tutorial, part 4

Hi folks!
Since I wasn't sure what colors I wanted to use, I used a random number generator to pick my DMC floss colors, for the base, and then the accent colors. It's an interesting combination, I kind of like it.

I'm filling the body of the brooch with long and short split stitches, so that there's a shading from light in the center, to dark at the outer edge. It's a nice effect, and can really glow in the right light. First I establish the direction of stitching with long stitches. I'm not worried about the long carry of thread on the back, since that's all going to get anchored, with the future stitching. I'm also using two strands of floss, and the Milliner's needle, since that's going to be rugged enough to stitch through any glue that might have gotten into the middle section (there will be glue in the middle section, there always is) As a note, do remember to separate your strands of floss, it will give you better coverage, and look better.

here's the random long and short stitching. I'm running the dark thread almost down to the center section. It's what I consider the dominant color, and I want it to show through the whole piece.

Continue with the second color, occasionally hitting the inner edge. Make sure to come up at the outer area, and come down close to the center. That helps with the directionality of the stitching. Also, I encourage you to split the previous color's stitches, that will help with the blending effect.

Finally, put in the lightest color, occasionally going out to edge of the shape. This is a highlight, and it just looks more luminous if you occasionally carry the highlight right into the darkest sections.

The main section is done (before embellishing, there will be embellishments of course) Go have another cookie.

Happy stitching!

Tutorial, part 3

Happy Monday, folks! (Yes, I know it's tax day, these things happen) Continuing with the tutorial, here we go...
After you've attached the wire, mix up some Elmer's glue (or similar goop) equal parts glue and water and brush it into the fabric around the shape, make sure to saturate the fabric well. Turn the piece over and repeat. I then dry the fabric with a hair dryer on a low setting, it takes a few minutes, and it's all nice and dry. You can also let the glue dry overnight, if you don't have a handy hair dryer. (a tip, try not to soak into the middle section, you can still stitch through the glued fabric, but it's easier if you don't have to do that.)

Pad the center outline, just like you did for the outer outline. (two strands of floss, worked in split stitch)

Okay, you've just finished the preparation phase of the project! Reward yourself, and go have a cookie.

Happy stitching!

Basic brooch tutorial, 2

Hi Folks! And....we're back!
(as always, click on the picture for a bigger version)
Transfer the pattern to your fabric by your preferred method. (If I can figure out how to do it, I'll post a pdf of this, it's just a nice basic shape) In this case I'm using prick and pounce. I drew the pattern on to a piece of scrapbooker's parchment paper, poked holes with a thick needle, and then used sidewalk chalk, and a stiff brush to transfer the pattern. I then connected the dots with a white gel pen (I love those things) If I was only doing one of these brooches, I'd have used a piece of tissue paper, and just stitched through it. I'm outlining the pattern with two strands of floss, worked with split stitch. Go around the pattern twice, and keep the stitches close together. This step is reinforcing the edge as well as providing padding for the future buttonhole stitching. 

Take a short length of the wire (about 6-8 inches) and couch it down around the outer edge of the stitching. Make sure to 'snug it up' to the stitching. I use the rayon because it acts more like a flat thread, and pulls in tighter then most others. This is a personal choice, you may not notice a difference. 

Since I'm pulling the stitches so tightly, I've *heavily* waxed the thread, it helps, not perfect, but it helps. 

A couple notes...Plan on at least 12 stitches per inch, you want this well anchored. Also, watch for slipknots on the back, they will make you cry later. (Not that I've had this experience, nope) (What will happen is that the wire will spring off the fabric, after you cut the form loose. I've had this happen a few times.) And finally. Don't start the wire at a center point, or in a visually obvious location, when you join up the end, you'll likely have a small bump of stitching, if you center it, it sticks out like a sore thumb. 

More on Monday! Have a good weekend, everyone!


Basic Brooch tutorial

Hi folks! I'm trying out an experiment with some of the settings on the blog, and trying to do a tutorial on how to do a basic brooch, this could be fun. (or a disaster of unprecedented proportions, leading to the doom of all mankind. But, that's really the worst case scenario, and utterly unlikely. ... I hope)

So here we go. ...
I'm doing a basic brooch for this. The goal is to have a project that takes between 6 and 8 hours for me to finish. (I've learned that students work faster than I do. This makes sense, since they don't see the same errors that I will, and move faster. I'm more deliberate, since I *really* hate pulling out bad stitches.) I will not be doing a demo of how to finish the back. I'll just use some really good glue and a pin back, it will still look great from the front. Or at least that's the plan. 

So, the first picture is of the necessary supplies for the first part of the brooch. you see the cast of characters up above. Here they are as an ingredient list.
  • Embroidery scissors
  • 4" embroidery hoop (not shown, the inner ring is wrapped in wool, to give it more tooth)
  • Brown tightly woven cotton (not a twill, more like cotton sheeting) The color isn't so important, I have about 40 yards of it. 
  • Needles: #10 Milliners' needle--it's long, straight, and strong. #9 Embroidery also very strong, good for working with multiple strands of floss. #12 Sharp, my preferred needle for couching. The brand is usually John James, since that's what I'm able to find in my area. 
  • mystery DMC embroidery floss, probably ecru, but it could be anything. Since it's for padding under other stitches, I'm not worried about the color. 
  • 28 gauge wire, for couching around the shape
  • Sulky rayon thread, waxed (heavily, no really, very heavily)
  • And optional, tweezers and a tailor's awl for poking and pulling the wire into position. 
In tomorrow's post I'll start getting to work.
Happy stitching everyone!

Huzzah!

It's DONE! Just to recap, this piece was about 270 hours, but it's done. And, that's what matters. Honestly I'm thrilled with how it turned out. I could have done more embroidery on the back, but I don't think it was necessary, the back looked really good as is. (I worked it with a single strand of gold, and a single (rather than doubled) thread) I have a note that I may need to do a piece with that technique on the front, just need to figure out the right use for it.

And now, the pictures, as always, click to enbiggen.


Happy stitching everyone, and go out and enjoy the weather, it's beautiful out there.